If your practical driving test is coming up, the unknown can feel more stressful than the driving itself. The good news is that the UK car test follows a clear structure. Once you know what happens from the moment you arrive to the moment you get your result, it becomes much easier to stay calm and focus on safe driving.
This guide walks through the standard car practical test step by step. It covers what the examiner says, what you will be asked to do, how faults are marked, and what happens if you pass or fail.
In Great Britain, the practical car test is run by the DVSA and usually lasts about 40 minutes. In Northern Ireland, the DVA manages testing, but the on-road experience is broadly similar. The official GOV.UK practical driving test guide explains that the test includes an eyesight check, vehicle safety questions, general driving, independent driving, one reversing exercise, and possibly an emergency stop.
The UK car test at a glance
The exact order can vary slightly depending on the examiner, the test centre and the route, but most car tests follow this general pattern.
| Stage | What happens | What matters most |
|---|---|---|
| Arrival | You arrive at the test centre and wait for the examiner | Being on time and having your licence |
| Licence check | The examiner checks your details and explains the test | Listening carefully and staying calm |
| Eyesight check | You read a number plate from the required distance | Wearing glasses or contact lenses if needed |
| Tell me question | You answer one vehicle safety question before driving | Basic car knowledge and clear explanation |
| General driving | You drive on a range of local roads | Safe control, observations and judgement |
| Manoeuvre | You complete one reversing exercise | Accuracy, control and all-round observation |
| Show me question | You demonstrate a safety task while driving | Keeping control while operating a control |
| Independent driving | You follow a sat nav or traffic signs for about 20 minutes | Planning ahead and making safe decisions |
| Result | You return to the test centre and receive feedback | Understanding what went well and what to improve |
Think of the test as a normal drive with a trained professional assessing whether you can drive safely without help. You are not expected to be perfect. You are expected to be safe, legal and in control.
Before you leave for the test centre
The test starts before you meet the examiner. A smooth arrival can make a big difference to your confidence, especially if you are nervous.
Make sure you take your UK driving licence with you. If you have an old-style paper licence, you will usually need to bring a valid passport as well. If you forget the required licence documents, your test can be cancelled and you may lose your fee.
If you need glasses or contact lenses to meet the eyesight standard, wear them from the start. You will need to read a number plate before you drive, and failing the eyesight check means the test will end immediately.
Most learners use their instructor’s car, which should already be suitable for test. If you use your own car, it must be roadworthy, insured for a driving test, taxed, have a valid MOT if required, display L plates and meet DVSA rules. You will also need an extra interior rear-view mirror for the examiner.
It is sensible to arrive around 10 to 15 minutes early. Arriving too late can mean the test cannot go ahead, but arriving extremely early may give you more time to overthink. Many learners book a short lesson beforehand to warm up, check manoeuvres and settle nerves.
Step 1: You arrive and meet the examiner
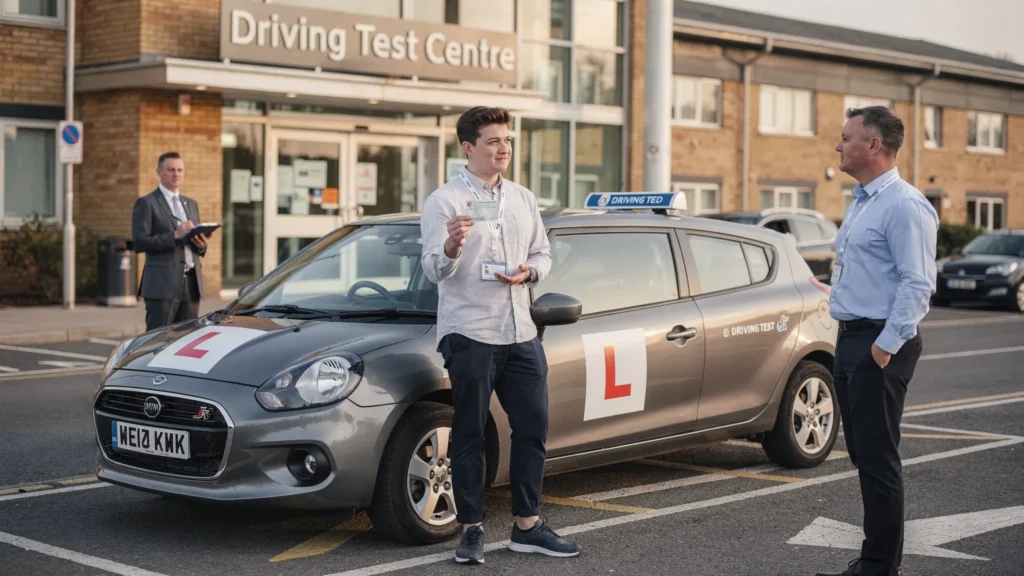
At the test centre, you will usually wait until the examiner comes out and calls your name. They will introduce themselves and ask to see your driving licence.
The examiner may ask you to confirm some details and sign a declaration. They will explain that they will give directions in plenty of time and that you should continue to follow the road ahead unless told otherwise.
You can usually choose whether your instructor, or another accompanying driver, sits in the back during the test. Many learners prefer to take the test alone because it feels less pressured. Others like having their instructor present for reassurance. If someone sits in, they must not help, signal, speak to you or interfere with the test.
The examiner may also ask whether you want your instructor to listen to the result and feedback at the end. This can be useful because your instructor can help you understand any faults and plan your next steps.
Step 2: The eyesight check
Before you get into the car, the examiner will ask you to read a number plate on a parked vehicle. For most modern number plates, the required distance is 20 metres. For older-style plates, it is 20.5 metres.
If you cannot read the plate, the examiner may ask you to try a second plate. If you still cannot meet the standard, the test will not continue. This is why it is important to check your eyesight well before test day, not just on the morning of the test.
If you pass the eyesight check, you move on to the vehicle safety question.
Step 3: The tell me question
Before you start driving, the examiner will ask one tell me question. This is a vehicle safety question where you explain how you would check something on the car.
Common topics include brakes, tyres, lights, steering, oil, coolant, windscreen washer fluid, head restraints and demisters. You do not need to sound like a mechanic. You need to show that you understand basic safety checks.
For example, you might be asked how you would check the brakes are working before starting a journey. A good answer would explain that the brakes should not feel spongy or slack, and the car should not pull to one side when braking.
If you want to revise these properly, read our full guide to show me, tell me questions before your test.
Step 4: You get into the car and prepare to drive
Once you are in the car, take a moment to set yourself up properly. Adjust your seat, mirrors and head restraint if needed. Put on your seatbelt. Check that doors are closed and that you feel comfortable with the pedals and controls.
Do not rush just because an examiner is sitting beside you. A calm cockpit drill shows good habits. If you are using your instructor’s car, it may already feel familiar, but still check everything before moving off.
The examiner will not try to trick you. They will give instructions such as taking the next road on the left or following signs towards a destination. If you do not hear or understand an instruction, ask them to repeat it. That is not a fault.
Step 5: The general driving section
During the main driving section, the examiner will assess how you handle real road and traffic conditions. This can include residential streets, busy junctions, roundabouts, crossroads, traffic lights, pedestrian crossings, dual carriageways and rural roads, depending on your test centre.
A standard car test does not include motorway driving. However, you may be asked to drive on faster roads or multi-lane roads if they are part of the local area.
The examiner is looking for safe, consistent decision-making. They are not expecting an advanced driver. They want to see that you can control the car, observe properly, respond to hazards, follow road signs and make progress when it is safe.
Here are the main areas being assessed.
| Driving area | What the examiner wants to see |
|---|---|
| Control | Smooth steering, braking, clutch or accelerator use, and correct gear choice where relevant |
| Observation | Effective mirror checks, blind spot checks and awareness of other road users |
| Positioning | Correct lane use, safe road position and good placement at junctions |
| Speed | Driving at a safe and legal speed for the conditions |
| Judgement | Choosing safe gaps, responding to hazards and not causing others to slow or change direction unnecessarily |
| Signals | Signalling clearly when needed and not misleading other road users |
| Planning | Looking ahead, anticipating problems and acting early |
If you make a small mistake, keep going. Many learners pass after making a few minor errors. The worst thing you can do is assume you have failed and let one mistake turn into several.
Step 6: The reversing manoeuvre
You will be asked to complete one reversing manoeuvre. The examiner chooses which one you do. For the standard car test, this could include parallel parking, bay parking, or pulling up on the right-hand side of the road, reversing for about two car lengths and then rejoining traffic.
The key to any manoeuvre is not speed. It is control, accuracy and observation. You should move slowly enough to correct the car if needed, while checking all around for pedestrians, cyclists, vehicles and other hazards.
If another road user approaches during the manoeuvre, respond safely. This might mean pausing, reassessing and continuing when it is safe. The examiner is not only judging whether you can park neatly. They are judging whether you can complete the manoeuvre safely in a real environment.
Step 7: The emergency stop, if selected
Not every learner is asked to do an emergency stop. DVSA uses it on some tests, so you should be prepared for it.
If selected, the examiner will explain the exercise first. They will ask you to stop as quickly and safely as possible when they give a signal. Before doing this, the examiner will check that it is safe behind.
After the stop, remember your observations before moving off again. A common mistake is performing the stop well, then forgetting to check mirrors and blind spots before rejoining the road.
Step 8: The show me question while driving
At some point while you are driving, the examiner will ask one show me question. This is different from the tell me question because you demonstrate something while the car is moving.
Examples include washing the windscreen, using the demister, switching on dipped headlights or sounding the horn where it is safe and legal. The exact question depends on the car and the situation.
The most important thing is to keep control of the vehicle. If you are unsure where a control is, say so and deal with it safely. Taking your eyes off the road for too long, swerving or losing control while trying to answer the question can create a bigger problem than not knowing the button immediately.
Step 9: The independent driving section
Independent driving usually lasts about 20 minutes. Most candidates follow a sat nav set up by the examiner. Some candidates follow traffic signs instead.
If you use a sat nav, the examiner will provide it and set the route. You do not need to touch it. You simply follow the directions while continuing to drive safely and legally.
Independent driving is not a memory test. If you take a wrong turning safely, it is not automatically a fault. The examiner will help you get back on route. What matters is how you deal with the situation. A safe wrong turn is usually far better than a rushed last-second lane change.
This part of the test checks whether you can plan ahead without constant prompting. Keep scanning road signs, lane markings and traffic flow. Use mirrors early. Position in good time. If you are unsure, choose the safest legal option.
Step 10: Returning to the test centre
Near the end of the test, the examiner will direct you back to the test centre. Stay focused until the car is parked and secured. Learners sometimes relax too early and make a mistake in the final few minutes.
Once parked, the examiner will ask you to switch off the engine. They will then tell you whether you have passed or failed. If you asked for your instructor to hear the feedback, they can usually come over at this point.
The examiner will explain any faults recorded. Try to listen carefully, even if you feel emotional. Whether you pass or fail, the feedback is useful.
How driving test faults are marked
The UK car test uses three main types of fault. Understanding these helps you keep mistakes in perspective.
| Fault type | What it means | How it affects the result |
|---|---|---|
| Driving fault | A less serious mistake that does not create immediate danger | You can still pass with 15 or fewer driving faults |
| Serious fault | Something potentially dangerous or a repeated pattern of unsafe driving | This results in a fail |
| Dangerous fault | Something that causes actual danger to you, the examiner, the public or property | This results in a fail |
To pass, you must make no serious or dangerous faults and no more than 15 driving faults. Repeating the same minor mistake can become serious if it shows a consistent problem, such as repeated poor mirror checks or repeated hesitation when it affects traffic.
A single stall, slightly wide turn or missed gear does not always mean failure. It depends on the context, your observations, how you recover and whether anyone is affected.
For more on the mistakes that most often lead to failure, see our guide to the top reasons learners fail their driving test.
What happens if you pass
If you pass, the examiner will give you a pass certificate. They may ask whether you want your full licence sent automatically, as long as your details are correct.
You can drive as soon as you have passed, provided you are properly insured to drive the vehicle. Do not assume your learner insurance automatically covers you as a full licence holder. Check before driving alone.
Passing is a big achievement, but it is also the start of independent driving. Your first few weeks on the road are important. Consider taking extra practice on motorways, night driving, rural roads or busy city routes if you have not experienced them much during lessons.
What happens if you fail
If you fail, the examiner will explain why. It can be disappointing, but it does not mean you are a bad driver. It means something on that drive did not meet the required standard on that day.
You will need to wait before taking another car practical test. Use that time well. Go through the test report with your instructor, recreate the situations that caused problems and practise until the fix feels natural.
If you believe there was a serious procedural issue with how the test was conducted, you can raise it through the proper complaints process. You cannot usually change a test result simply because you disagree with the examiner’s judgement, but a clear written account can help if you need to explain what happened. If writing formal correspondence feels difficult, an AI letter generator can help you structure a professional letter that you can then check and personalise.
The most productive next step is usually a focused plan. Work on the specific fault, book more lessons if needed and choose a new test date only when your instructor agrees you are ready.
How to feel more prepared before test day
A good final week is not about cramming. It is about confirming that you can drive safely without help. Ask your instructor to run at least one mock test under realistic conditions, including independent driving and a manoeuvre.
Practise around the kinds of roads used by your local test centre, but do not rely on memorising routes. Examiners can vary routes, roadworks can change plans and traffic conditions are never identical. Focus on transferable skills: reading signs, choosing lanes, dealing with meeting traffic, judging gaps and managing nerves.
It also helps to keep lessons consistent up to your test. Long gaps can affect confidence, especially if you are close to test standard. If you need more local practice or want an instructor who understands your test centre area, My Driving Instructor lets you search by postcode, compare verified ADI and PDI instructors, read reviews and book lessons in the app.
You can also read our guide on how to pass your driving test first time for practical preparation tips.
Frequently asked questions
How long does the UK car test take? A standard practical car test usually takes about 40 minutes. Extended tests, which apply in some disqualification cases, take longer.
Can my driving instructor sit in the car during the test? Yes, you can usually ask your instructor to sit in the back. They must not help, speak, gesture or interfere with the test.
Do you fail if you go the wrong way? Not automatically. If you take a wrong turn safely and legally, the examiner will redirect you. A dangerous last-minute correction is much more serious than going the wrong way.
How many minors are allowed on the driving test? You can pass with 15 or fewer driving faults, often called minors, as long as you make no serious or dangerous faults.
Will I have to do an emergency stop? Possibly. Not every test includes one, but you should be ready. If selected, the examiner will explain it and give a clear signal.
Can I drive immediately after passing? Yes, you can drive immediately after passing if you are properly insured. Make sure your insurance covers you as a full licence holder before driving alone.
Ready to feel test-ready?
Knowing what happens on the UK car test can remove a lot of uncertainty, but confidence comes from proper preparation. A good instructor will help you practise real test conditions, fix weak areas and understand when you are genuinely ready.
With My Driving Instructor, you can find verified driving instructors near you, compare prices and reviews, book lessons by postcode and track your progress. Search for an instructor who matches your learning style and go into your car test knowing exactly what to expect.
Key Takeaways
- Research your options and compare different instructors before booking
- Consider your learning style and choose manual or automatic accordingly
- Budget for the full journey including test fees and practice time
- Stay consistent with lessons to retain skills between sessions